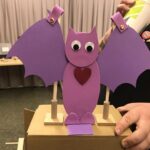
Join the team from Cabaret Mechanical Theatre for an online workshop creating automata using mechanisms, electronics and storytelling. About this event This practical experimental workshop is an online course for artists, makers and educators interested in combining programming electronics and crafting with cardboard, wood and wire. We will be working with the BBC micro:bit – […]
Blog
Automata Tinkering Global Workshops – September 2021

Join other artists, makers & educators from all over the world to discover & share automata making ideas & mechanisms in an online workshop. Tickets are available via Eventbrite About this event This six week programme has been designed to explore the combination of art and engineering. The workshops will be led by experienced facilitator […]
Summer Exhibitions
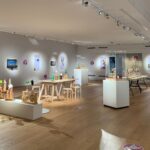
We are delighted to let you know that there are a number of exhibitions featuring automata from the CMT collection open now or coming soon. Cabaret Mechanical Marvels is at the St. Albans Museum until June 27th, then it will travel to Poole in July and Oxfordshire in September. Ingenious Contraptions is at the Hastings […]
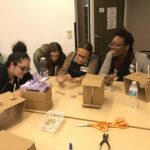
About Our Online Workshops
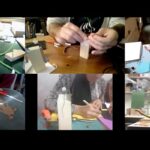
Learn how to make automata online with our tinkering and micro:bit workshops.
Keith Newstead – RIP

We are very sad to announce that Keith Newstead passed away this weekend (Nov. 7/8) at the age of 64. Keith was a dear friend and exceptionally talented maker. He will be very sorely missed. Our thoughts are with his family at this difficult time. Update, 14 December: an obituary in The Guardian. Photo credit: […]
At Last, a Show Opens
Our first exhibition since the sadness of Covid arrived opens today in Gosport. You can check dates, times and directions on the Gosport Gallery website but the gist is, 15th October to 19th December. The gallery is open from 10 to 4, closed Sunday and Monday but please check before travelling and book your visiting […]
Culture Recovery Fund Award
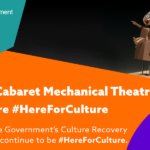
We are delighted to announce that we have been awarded £160,000 by Arts Council England (ACE) via the Culture Recovery Fund. This grants programme is part of the Government’s £1.57 billion package to protect the UK’s culture and heritage sectors from the impacts of Covid-19. When lockdown happened in March our upcoming exhibitions were cancelled or postponed, […]
Junk Automata Make-a-thon Oct/Nov 2020
Join us for a full day of tinkering building creepy and cute Halloween automata using everyday materials from around your house. About this Event In this family workshop we’ll connect in the morning for an introduction to the world of automata or moving kinetic sculptures. We’ll talk together about tools and materials, explore some inspirational […]
Computational Contraptions Workshop – November 2020
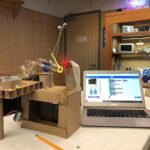
Join the team from Cabaret Mechanical Theatre for a new workshop that explores the world of digital and physical materials. About this Event This experimental workshop is an online course for artists, makers and educators interested in combining programming electronics and crafting with cardboard, wood and wire. We’ll work with the BBC micro:bit – an […]
Automata Tinkering Workshop – January 2021
An online workshop for artists, makers and educators, where you’ll learn about the world of automata – playful, humorous kinetic sculptures. About this Event UPDATE: This event is sold out. To be informed about future running please join our Makers mailing list. Our Automata Tinkering Workshop combines art and engineering. Six 2-hour sessions on Tuesdays […]