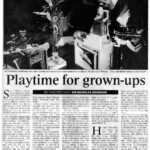
Whilst we were in Covent Garden (1984-2000) Cabaret Mechanical Theatre was one of Sir Nicholas Goodison’s favourite shops. This article from The Times in 1997 details some of the automata that he loved. Sir Nicholas sadly passed away in 2021. Over his lifetime, starting at age 19, he amassed a magnificent collection of over 900 […]
Blog
The Story Behind our Online Automata Courses
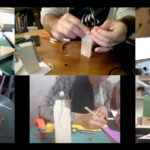
UPDATE: 2024 Workshop Available Now We are overjoyed to be running our online Automata Tinkering Global Workshop in January for the 7th time. We never imagined back in Sept 2020 that there would continue to be such an appetite for online making. Like everyone in the pandemic, we cautiously ventured into meeting online and discovered […]
CMT at STEAM CONF 22 – Barcelona
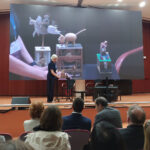
By Lisa Finch, CMT Development Director In October we had the huge pleasure of taking part in the eighth edition of STEAMConf 22 (Science, Technology, Engineering, Arts, Maths) in Barcelona, the fantastic vision of daughter, mother and son; Mariona and Paca CÃllar and Ian Floyd Jones co-founders of Sokotech. This year they brought together researchers, […]
Automata Tinkering Global Workshop – January 2023
Join other artists, makers & educators from all over the world to discover & share automata making ideas & mechanisms in an online workshop. Tickets are available via EventBrite About this event This six week programme has been designed to explore the combination of art and engineering. The workshops will be led by experienced facilitator […]
Made in Stithians Remastered
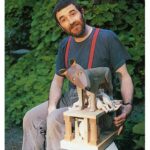
Made in Stithians: a portrait of Paul Spooner at work Launch offer: £1 / $1 off until 31st August when buying the download. Previously available on VHS and DVD, now re-mastered for digital. Watch the trailer or buy / rent here. What do artists do all day? In 1993, the filmmaker Gary Alexander, followed Paul […]
Fabricating Motion Automata Workshop – October 2022
A hands-on 6 week automata making online workshop for curious and inventive makers exploring mechanisms & low-tech kinetic engineered art. Tickets are available on EventBrite About this event Description Cabaret Mechanical Theatre is thrilled to be able to offer this pilot of a new automata making online workshop, and that there continues to be a […]
Automata Tinkering Global Workshop – September 2022

Join other artists, makers & educators from all over the world to discover & share automata making ideas & mechanisms in an online workshop. Tickets are available via EventBrite About this event This six week programme has been designed to explore the combination of art and engineering. The workshops will be led by experienced facilitator […]
Howling Cats

Last month, Paul Spooner made 10 Howling Cats in aid of the Ukraine catastrophe. “The heads and arms are made from lime wood but the bodies, being fairly featureless, are made from a lump of scrap timber I found on a building site. The flag is of copper painted yellow and blue, two colours I’ve […]
Automata Tinkering Global Workshop – May 2022
Join other artists, makers & educators from all over the world to discover & share automata making ideas & mechanisms in an online workshop. Book tickets on EventBrite About this event This six week programme has been designed to explore the combination of art and engineering. The workshops will be led by experienced facilitator Ryan […]
Automata Tinkering Global Workshops – Jan 2022

Join other artists, makers & educators from all over the world to discover & share automata making ideas & mechanisms in an online workshop. About this event This six week programme has been designed to explore the combination of art and engineering. The workshops will be led by experienced facilitator Ryan Jenkins from Wonderful Idea […]